How to color black and white photo in Adobe Photoshop ?

Photoshop is one of the professional photo editing software and available in windows and mac operating system. It includes lots of tools, filter, pretest and many photo editing tools. We can do professional editing using adobe Photoshop. This is the most easiest way to color black and white photo.
Coloring Black and white photo in Photoshop
In past time color print is not used. Black and white profile was used in that period. With advancement of technology color print was developed . Color printing came to use worldwide since about 2 decades. Before that B/w photos and printing were popular. That’s why most of us have old black and white photos of our mother, father and our fore-father. These kind of photos are contains only poor black and white profile so photos do not look nice. But we have a solution for making these photos colorful and nice. Way is editing photo using adobe photoshop.
For tutorial of coloring black and white photo, we use latest version of photoshop i.e Adobe Photoshop CC (2015).
Things you should have before Editing:
- Black and white photo which want to color
- Adobe Photoshop, I prefer you to use latest version of photoshop.
If you have these 2 materials then you can color black and white photo in photosop.
Steps to color Black and white photo in Adobe Photoshop CC 2015:
Open Adobe Photoshop – If windows , to open photoshop, go to run and type command ‘photoshop.exe‘ (exclude aprostopy) but in mac operating system , if you already installed adobe photoshop you can find it in launchpad.
 |
| Image : Open B/w Photo from file |
After you open adobe photoshop , open black and white image which you want to color.
 |
| Image :Selecting tools in photoshop |
First thing we should do while coloring photo in photoshop is selecting particular part of image using any selecting tools like marquee, lasso and quick selection. As a single image has different elements inside it. Consider photo of our parents, it may include different family members like father, mother , brother , sisters etc and each person itself has different elements like different body parts i.e hair, face, hand not only this also clothes like jacket, hat, ornaments. So all of these different element has different color and yes some may have same color. So to color each element inside a single black and white photo we have to select each and every elements sequently and color them step by step.
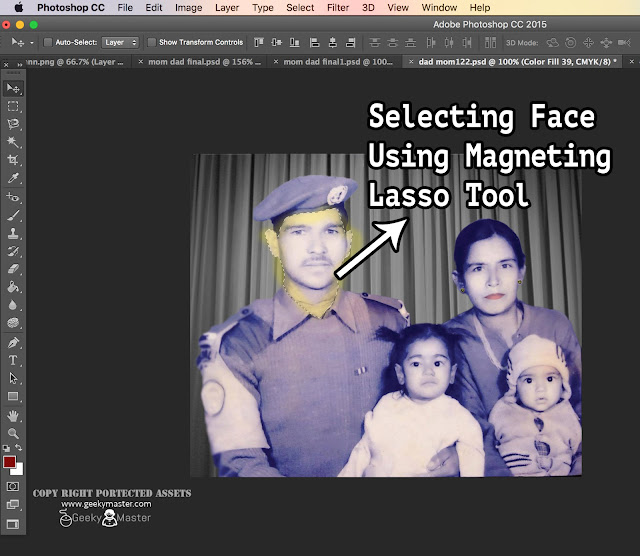 |
| Image : Selecting element in Photoshop |
After selecting particular elements, we have to add solid color for that selection. In solid color first guess color for that particular elements and choose suitable color in color panel. Suppose if you have selecting face of person then chose the light brown color as we know human face is somehow like brown color, isn’t it 🙂
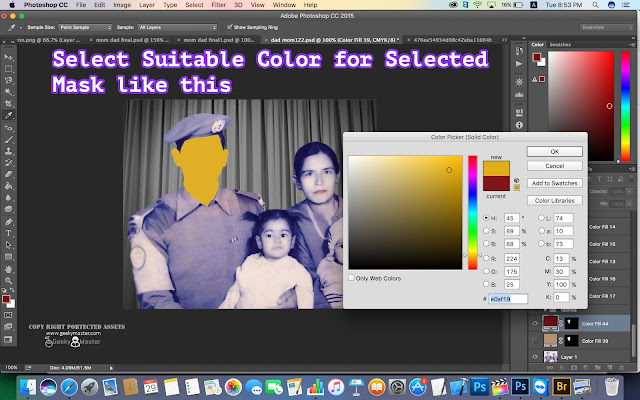 |
| Image : Selecting solid color layer for selected element |
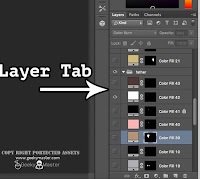 |
| Image : Layer Tab in photoshop |
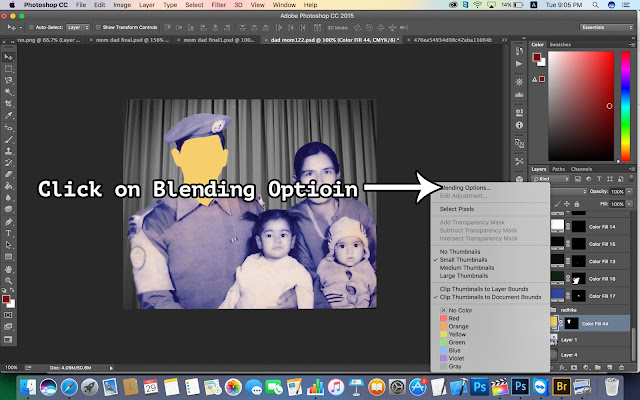 |
| Image : Blending option in photoshop |
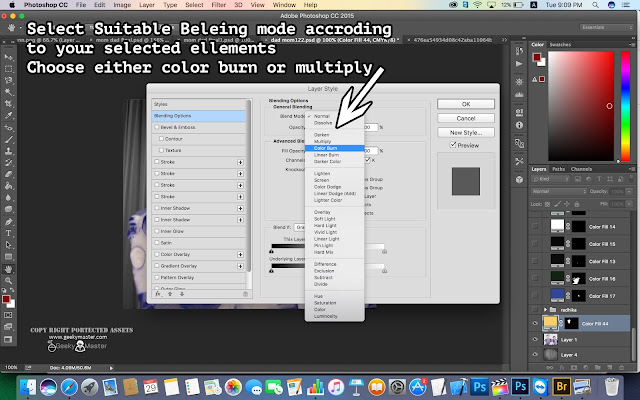
After that solid color layer mask will be created. Now we have to blend this solid color layer with suitable blending option. For this, go to layer tab which appears in right hand side in photoshop and in there choose that solid color layer you created recently and right click on this and click on ‘blending options..’
In blending options we should choose suitable blending mode for selected mask. Basically for human skin and face we use color burn and for most of other black and white elements we use multiply mode. So select anyone of these two mode as per your selected mask and then click ok.
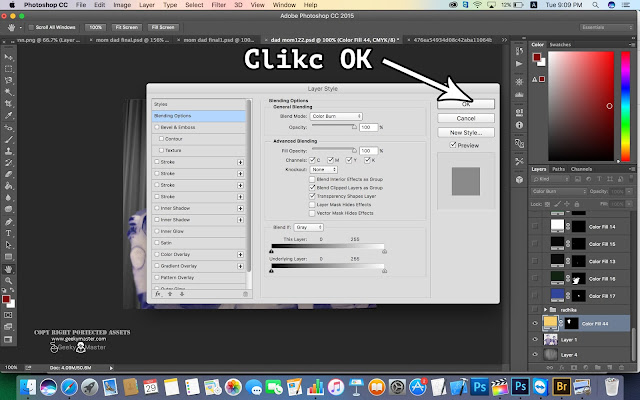 |
| Image : Clicking on Ok |
Now see the magic :). One elements of your black and white photo get colored.
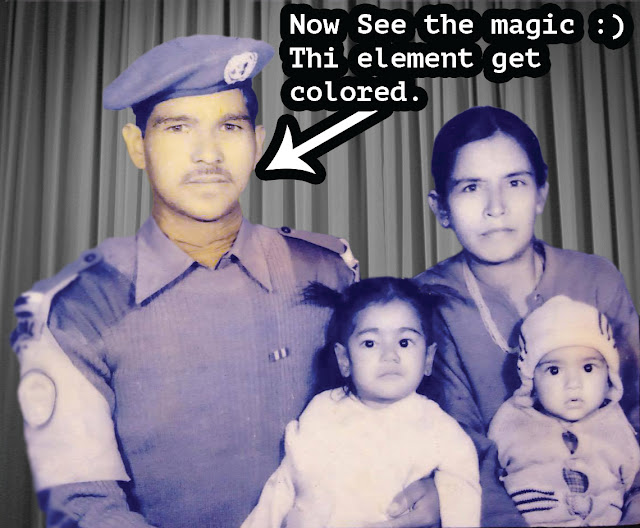 |
| Image : Result of solid color layer and blending option |
*note : Similarly you have to repeat the above process for each and every elements of your black and white photo. It may takes your couple of hours but you will get quality colored images and you can gift your granny and to all to whom it belongs to and make them happy with cute smile.
Color Each and very element of black and white photo step by step like this :
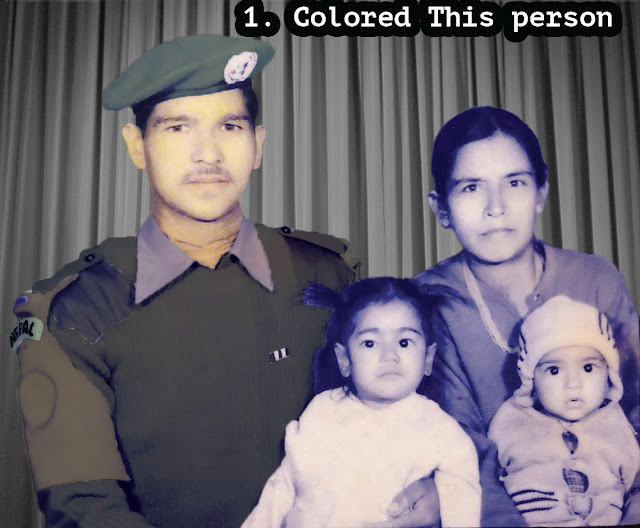 |
| Image: First person element has been colored |
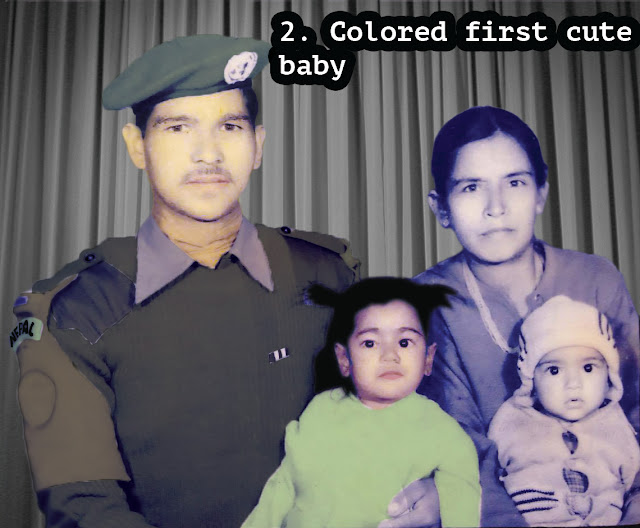 |
| Image: First little baby has been colored |
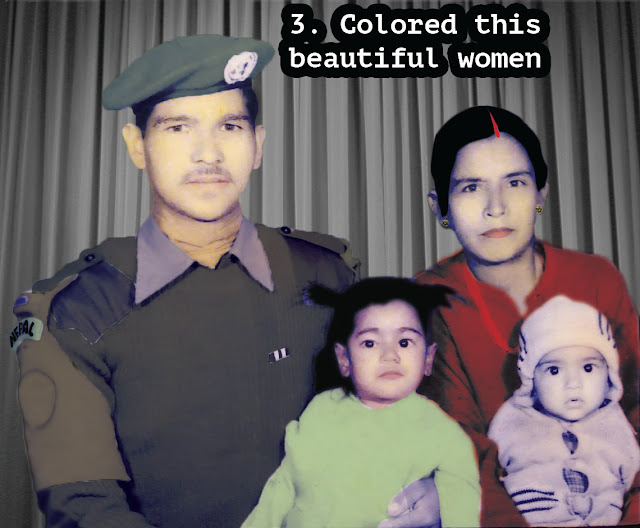 |
| Image: Women had been colored |
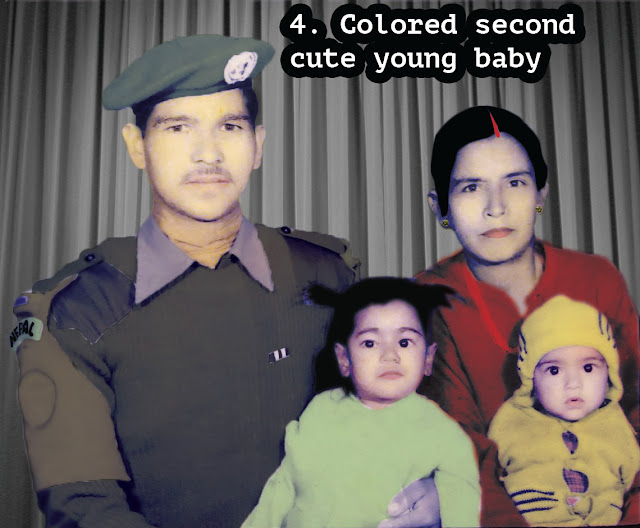 |
| Image : Second little baby has been colored |
If you want to see video tutorial for coloring black and white photos you can go through youtube channel —–> Our Official Youtube Channel
If you guys like this tutorial then share to social media to let your and other people know about this. Thank you.


